Introduction
The QS-Products app is designed to manage and configure products that can be used in the QuickSale 2.0 application. This app enables users to add, modify, and delete products, ensuring seamless product selection during transaction processing.
Getting Started
1. Installation
To begin, download and install the QS-Products app on your Android device. If you haven’t already, contact our support team at support@chargeanywhere.com to obtain your license number.
2. Account Setup
Open the app and create your account with your license number and phone number. Once your account is set up, you can start accepting payments and managing your transactions.
Registration
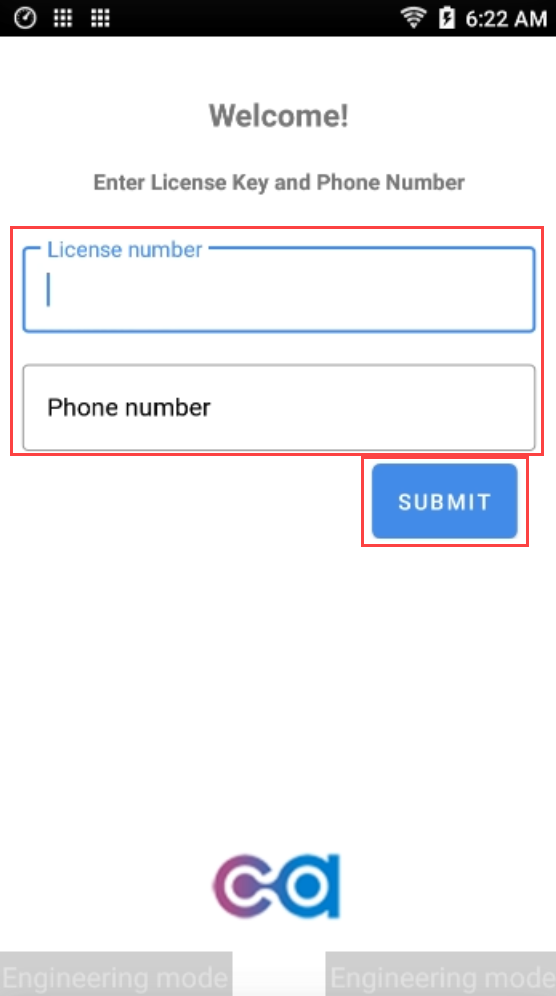
Open the app on your device, and you’ll be prompted to enter your registration credentials.
- Enter the license number in the License number field.
- Enter the phone number in the Phone number field.
- Click Submit to complete the registration process and log into your account.
Home Screen
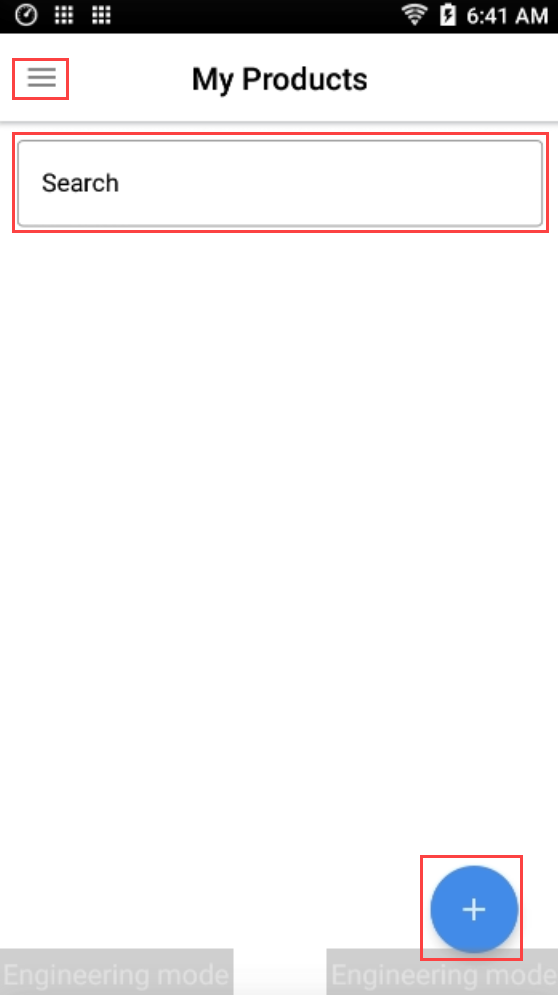
Upon launching the QS-Products app for the first time, users are greeted with the My Products screen. This serves as the central hub where products are listed and managed.
Initial State
- The product list is empty when users log in for the first time.
- The My Products screen displays only the search bar and the floating add button (+) in the bottom right corner.
- Users can start adding products by tapping the + button.
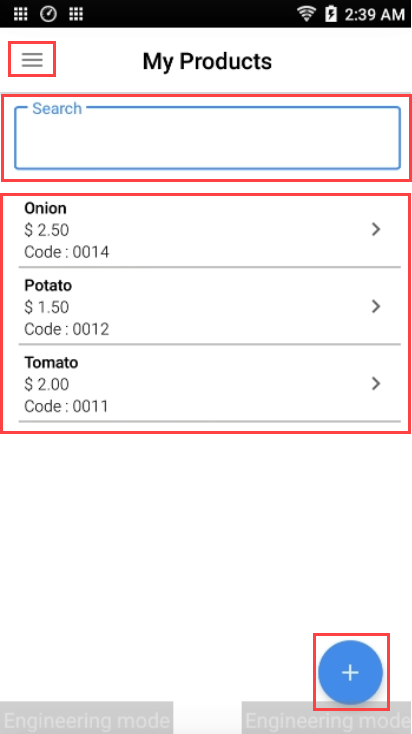
After Adding Products
- Once products are added, they appear below the search bar.
- Each product entry includes its name, price, and product code.
- Users can browse and search for products easily.
Additional Features
- The hamburger menu (☰) in the top left provides access to additional settings and app management options.
- The floating add button (+) in the bottom right allows users to add new products.
Adding a New Product
To add a new product, follow these steps:
1. Tap the + button on the bottom right corner of the home screen.
2. The Add Products screen will appear, prompting users to enter product details:
- Product Name: Enter the name of the product.
- Product Code: Assign a unique code for the product.
- Price: Set the product’s price.
3. Tap the Add button to save the product.
4. To clear the form without saving, tap the Clear button.
5. After the product is added, it is added to the My Products screen and a message appears at the bottom of the screen: “Product added successfully“.
Viewing and Editing Products
To edit a product, follow these steps:
1. From the My Products screen, tap any product to open its details.
2. Tap the Edit button to edit the product.
3. Modify the following, if required.
- Product Name: Enter the name of the product.
- Product Code: Assign a unique code for the product.
- Price: Set the product’s price.
4. Save changes automatically by tapping the Save button.

Deleting a Product
To delete a product, follow these steps:
1. From the My Products screen, tap any product to open its details.
2. Tap the Delete button to delete the product.
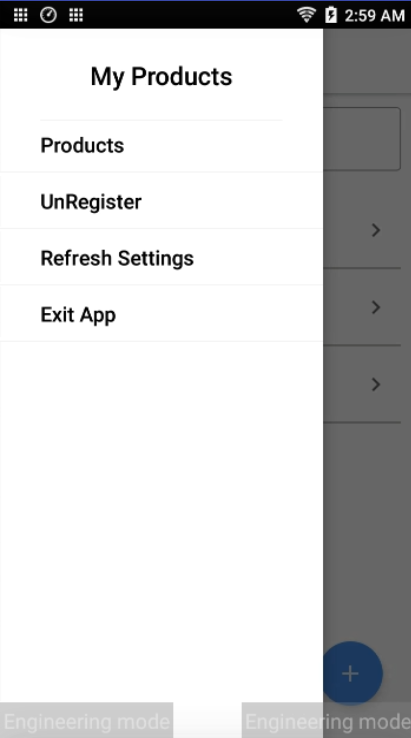
Navigating the Menu
Tapping the hamburger menu (☰) on the home screen reveals additional options:
- Products: Navigates back to the main product list.
- Unregister: Logs the user out or removes the app registration.
- Refresh Settings: Refreshes the product list to ensure updates are synchronized.
- Exit App: Closes the QS-Products app.
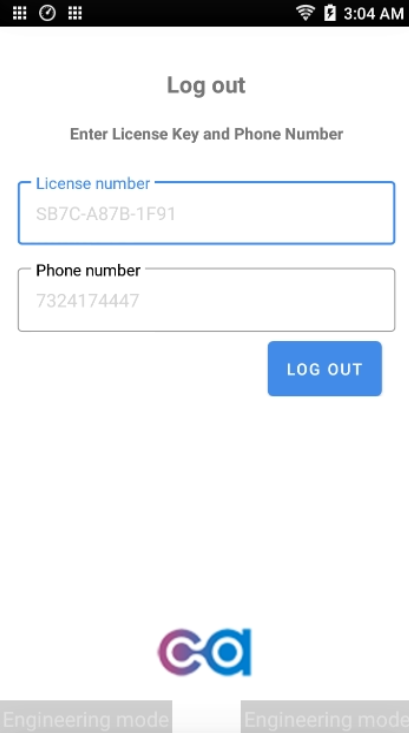
Unregistering the App
If you select Unregister, the app prompts for your License Key and Phone Number before proceeding. Follow these steps:
1. Tap Unregister from the menu.
2. Enter the License number (if required).
3. Enter the Phone number.
4. Tap LOG OUT to unregister the app.
Note: Once unregistered, the app must be reconfigured before use.
Syncing with QuickSale 2.0
Once products are added in QS-Products:
- Open QuickSale 2.0.
- Tap My Products on the Sale screen.
- If products are not visible, tap the Refresh icon to sync them.
- Products will appear and be ready for selection in transactions.
Note: To learn more about the QuickSale 2.0 app, including how to perform sales with line items, refer to the QuickSale 2.0 App User Guide.
Conclusion
The QS-Products app simplifies inventory management by providing an intuitive interface for adding, modifying, and syncing products with QuickSale 2.0. To ensure smooth transactions, always refresh products in QuickSale 2.0 after making changes in the QS-Products app.
Subscribe to Documentation Updates
Receive a monthly summary of new and updated technical documents.