• Home
  • Merchants
  • Developers
  • Partners
  • Contact
  • Home
  • Merchants
  • Developers
  • Partners
  • Contact

HOME / Batch Transactions for Merchants Guide

  • Valid Transaction Responses and Codes
  • QuickSale TapToPhone User Guide
  • QuickSale 1.0 App User Guide
  • QuickSale 2.0 App User Guide
  • QS-Products App User Guide
  • Text To Pay User Guide
  • Payment Form Guide
  • Virtual Terminal User Guide
  • Batch Transactions for Merchants Guide
  • How to Set Up and Enable TOTP within Transaction Manager for Merchants
  • PaymentModule iOS SDK Developer Guide
  • Capturing Android Logs with Logcat
  • Device Setup Guide for QuickSale 2.0
  • Auth Only Database User Guide and Specifications
  • How to Set Up and Enable TOTP within Transaction Manager for Channel Partners
  • Batch Processing Specifications for Merchants
  • How to Manually Clear Data and Cache on a QuickSale Device for Channel Partners
  • Semi-Integration Application User Guide
  • Payment Form Specifications
  • QuickSale-Tab Videos
  • How to Retrieve Client Key and Client Secret
  • How to Retrieve Merchant ID, Terminal ID, and Secret
  • How to Retrieve Merchant ID, Terminal ID, and Identification
  • Customer Import Specifications
  • Gift Card Service Ordering for Merchants
  • How to Install a Wi-Fi Repeater
  • Recurring and Installment Import Specifications
  • QuickSale POS QSR Application User Guide
  • QuickSale POS Retail Application User Guide
  • How to maintain battery in terminal
  • Charge Anywhere RMA and Repair Procedures
  • ComsGate® Payment Form Quick Start Guide

Batch Transactions for Merchants Guide

279 views 15

1. Introduction

Batch transactions allow you to process multiple transactions at once by uploading a file with transaction data. This guide will walk you through the process of uploading and managing batch transactions in the Virtual Terminal.

2. Steps to Process Batch Transactions

Step 1: Navigate to the Batch Transactions

  1. Login to Transaction Manager.
  2. Select Batch Transactions under Virtual Terminal in the top menu.
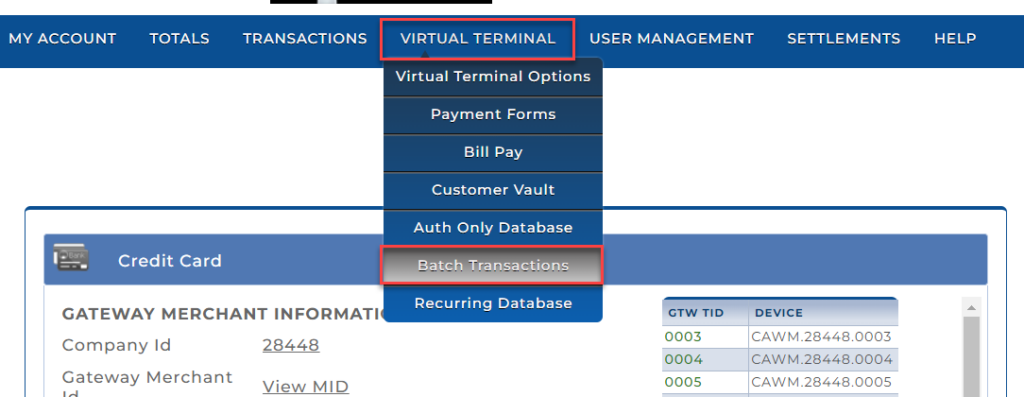
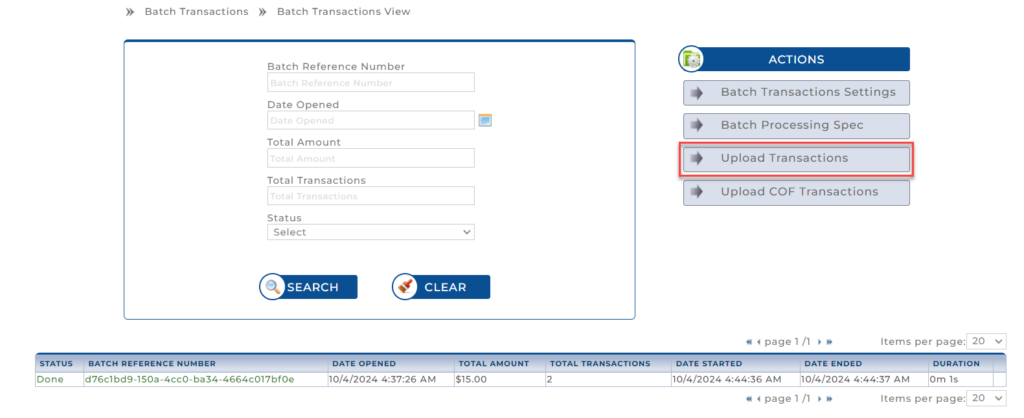
  3. Select Upload Transactions under Actions.

Step 2: Prepare Your File for Upload

  1. Click the Download Batch Transactions Template to download the template file if you do not already have a file prepared.
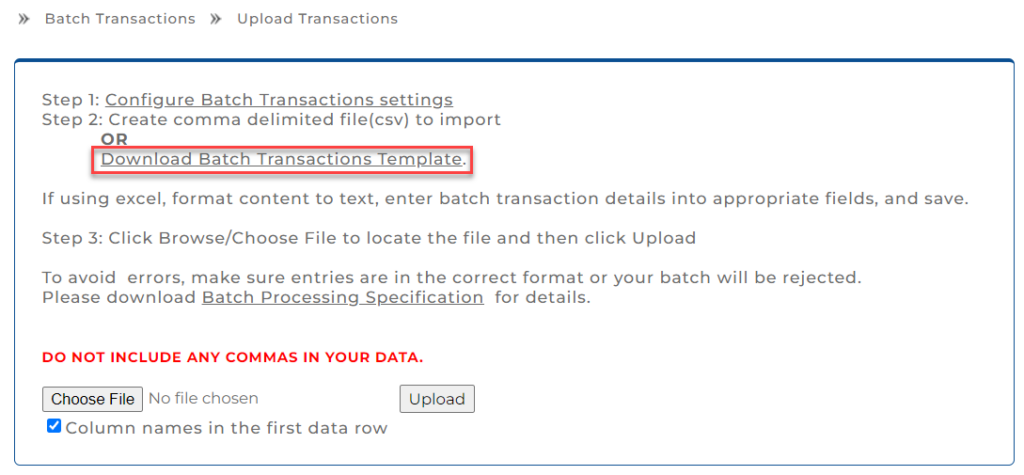
  2. Refer to the Batch Processing Specifications document to ensure the data in your CSV file is in the correct format.
    • Make sure all required fields like Transaction Type, Card Number, Expiration Date, and Amount are properly filled.

Step 3: Upload the Batch File

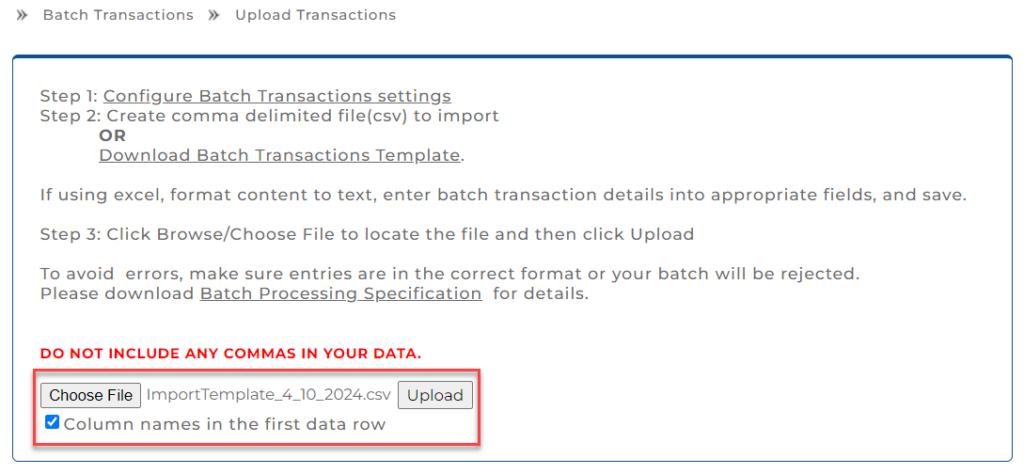
  1. Click Choose File and locate your batch file.
  2. Ensure the Column names in the first data row checkbox is selected if applicable.
  3. Click Upload.
    • The system will verify the file format. If there are any errors in the file (such as missing or incorrectly formatted data), you will be prompted to correct them.

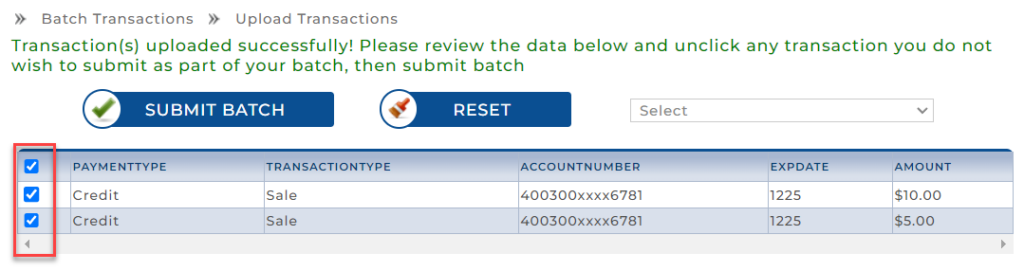
Step 4: Review the Uploaded Transactions

  1. After the successful upload, a list of transactions is displayed on the screen.
  2. Review the transactions to ensure everything is correct.
    • If you do not want to process certain transactions, uncheck the corresponding box for that transaction.

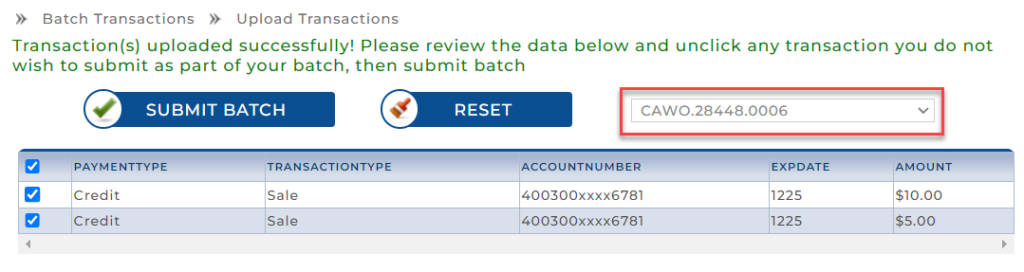
Step 5: Select the Device for Processing

  1. From the dropdown menu, select the device to process the transactions.

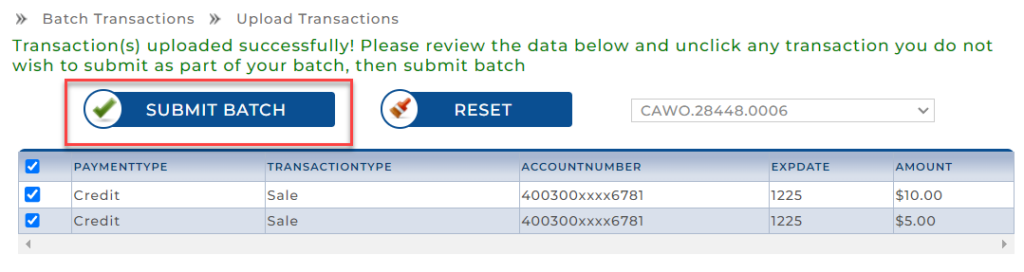
Step 6: Submit the Batch

  1. After reviewing the transactions and selecting the device, click Submit Batch.
  2. A confirmation screen appears with transaction details.

Step 7: Confirm the Batch

  1. Review the details on the confirmation screen.
  2. Click Confirm Batch to proceed with processing the transactions.

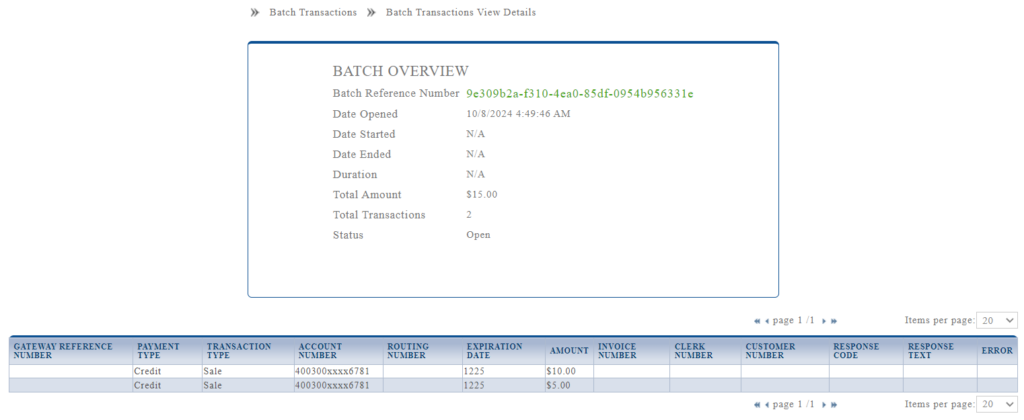
Step 8: View Batch Details

  1. After confirming, the batch is processed, and you can view the status of the batch.
  2. To review the batch, click Open to see detailed information, including transaction status, amounts, etc.

Was this helpful?

15 Yes  No
Previously
Virtual Terminal User Guide
Up Next
How to Set Up and Enable TOTP within Transaction Manager for Merchants

This website and content contains confidential, trade secret information, which is proprietary to Charge Anywhere, LLC, and its subsidiaries (collectively “Charge Anywhere®”) and is provided solely for the recipient's use in connection with the recipient’s participation in one of the Charge Anywhere’s Payment Gateway Programs. Charge Anywhere reserves the right to make changes to the specifications at any time and without notice. The information furnished by Charge Anywhere in this publication is believed to be accurate and reliable as of the date of its release; however, no responsibility is assumed by Charge Anywhere for its use, nor for infringements of patents or other rights of third parties resulting from its use, nor for the violation, misinterpretation, or misapplication of any laws, or any regulation of any credit card association including Visa USA, Visa International, or MasterCard International. No general license is granted under any patents, copyrights, or other intellectual property rights owned by Charge Anywhere and the recipient is only granted an end user license to use this information for the purpose of participating in one of Charge Anywhere’s Payment Gateway Programs, pursuant to an agreement with Charge Anywhere or one of its authorized Program partners. All modifications or improvements to any of the information and specifications in this document shall belong exclusively to Charge Anywhere, LLC. No unauthorized copying, disclosure, or use of this document is permitted without the express written consent of the Charge Anywhere, LLC.

  • Privacy Policy
  • Terms of Use
  • Copyright 2024 Charge Anywhere. All Rights Reserved

×