1. What is TOTP?
TOTP is an acronym for Time-based One-Time Passwords. TOTP is a type of Authenticator app. Authenticator apps are used as a second layer of security beyond entering a password, which helps provide an additional level of protection against unauthorized access to online accounts.
If you already have TOTP installed on your mobile device, you are welcome to skip ahead to How to Set Up TOTP within Transaction Manager. (link)
2. How Authenticator Apps like TOTP Work
When setting up an authenticator app, you link your online account(s) to the app by scanning a QR code or manually entering a unique key provided by the service you wish to secure. Once the account is linked, the app generates a unique, time-sensitive code that you need to enter alongside your account’s username and password during the login process. The code changes every few seconds, adding an extra layer of security that makes it significantly more difficult for hackers to gain unauthorized access to an account.
3. Examples of Popular Authenticator Apps
Google Authenticator

Developed by Google, this app is widely recognized and used for Two-Factor Authentication (2FA) across various platforms and services. It supports algorithms for both TOTP and HOTP (HMAC-based One-Time Password; HMAC stands for Hash-Based Message Authentication Code and in cryptography, it stands for a message authentication code using a cryptographic hash function and secret cryptographic key).
Download Links
Microsoft Authenticator

Microsoft’s authenticator app is designed to provide an additional layer of security for Microsoft accounts. Features include fingerprint or face recognition for quick and secure access.
Download Links
Twilio Authy Authenticator

Authy is a popular authenticator app that goes beyond TOTP. It provides encrypted cloud backup and multi-device synchronization, allowing users to access their codes across multiple devices. Authy also offers an intuitive interface and supports features like PIN (Personal Identification Number) protection and biometric authentication.
Download Links:
4. How to Set Up the TOTP App on Your Mobile Device
Most authenticator apps follow a similar process. In this example, we will be following the process with Google Authenticator being set up on an iPhone, as Google Authenticator is one of the most frequently used apps for TOTP.
You will need two devices in order to easily complete this process:
- Your mobile phone with camera capabilities
- A laptop, PC, Mac, or tablet with your email and browser open
Perform the following steps:
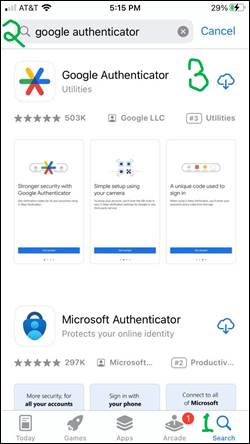
1. Go to the App Store and click the Search Feature (1).
2. Enter Google Authenticator in the Search field (2)
3. When Google Authenticator comes up as one of the app options, click the download icon (3) to download the application to your mobile device.
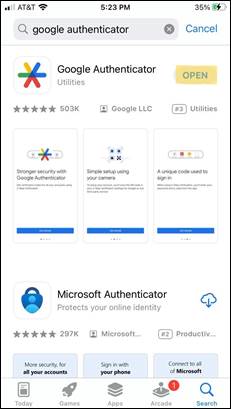
4. Once the app has finished downloading, there will be an option to Open the app. Select OPEN.
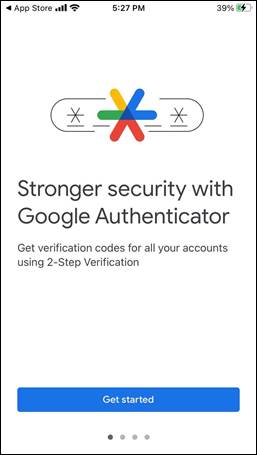
5. You will then be brought to an introductory screen welcoming you to get verification codes for all your accounts using two-step verification. Click Get Started at the bottom of the screen.
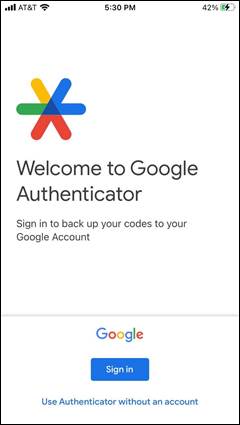
6. You will then be directed to a Sign in screen. Click Sign in and then go ahead and sign in.
Once you select Sign in, the following message will pop up:
“Authenticator” Wants to Use
“google.com” to Sign In
This allows the app and website to
share information about you.
Cancel | Continue
7. Select Continue.
This will bring you to a Sign in page where you can sign in with your Google Account.
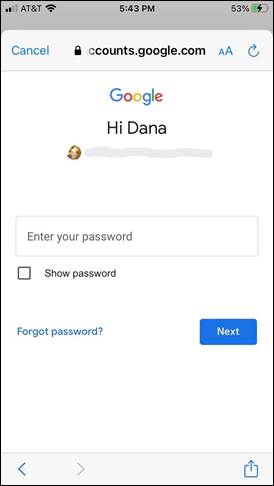
8. Enter your email or phone and select Next, then enter your password and select Next.

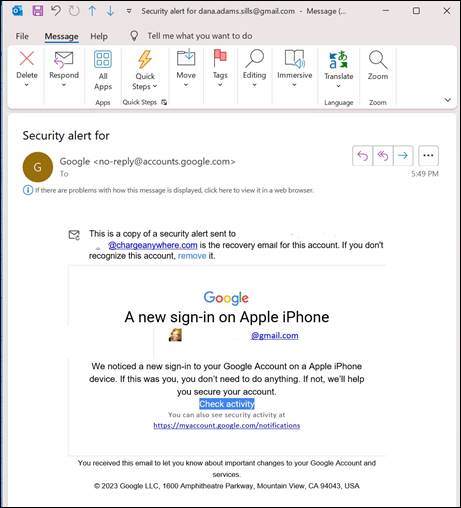
9. You will then come to a screen asking you to Add a code. Simultaneously you will receive a security alert email to the email address associated with your Google sign in advising that a new sign in occurred from a phone. Since that was you setting up Google Authenticator, you don’t need to do anything further with that email.

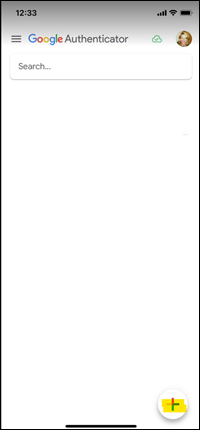
10. On your phone, select Add a code.
11. You will then be brought to a screen asking you to Scan a QR code or Enter a setup key. We recommend selecting Scan a QR code.

You will then receive a message as follows:
“Authenticator” Would like to
Access the Camera
Authenticator uses your camera to
Scan barcodes.
Don’t Allow | OK
12. Select OK
Now you are ready to enable TOTP within Transaction Manager.
5. How to Pair your TOTP App to Your Transaction Manager Account
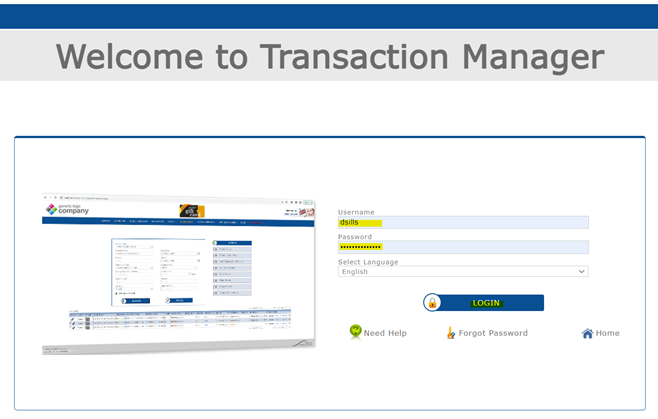
1. Log into Transaction Manager.
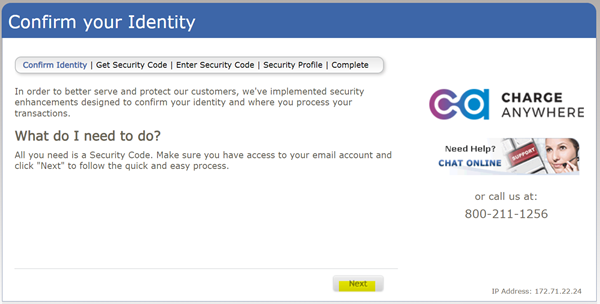
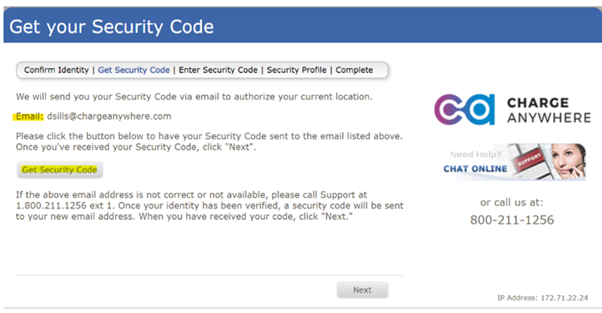
2. This will bring you to a page advising we need to confirm your identity through the sharing of a Security Code to your email account. Select Next.
3. You will then be brought to a screen showing your email address on file. Click Get Security Code.
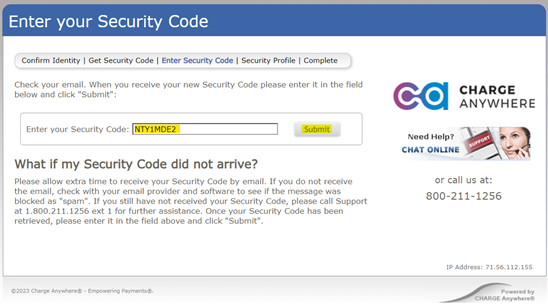
4. You will then see the following Enter Your Security Code screen.
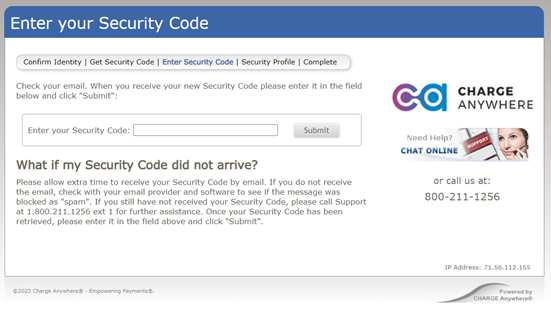
Simultaneously, you will receive an email with a Security Code that you should copy to your clipboard.

5. Paste the copied Security Code into the corresponding field on the screen and then click Submit.
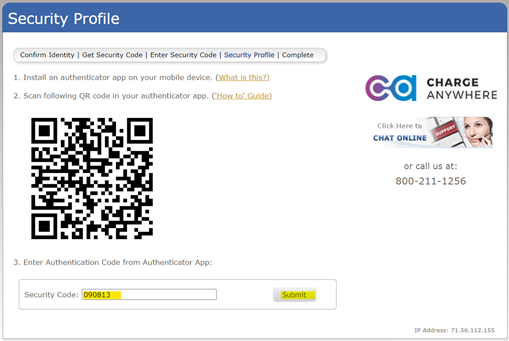
You will then see a Security Profile screen as follows, advising you to install an authenticator app, in the event that’s not already been done and then asking the user to scan a unique QR code using the app.
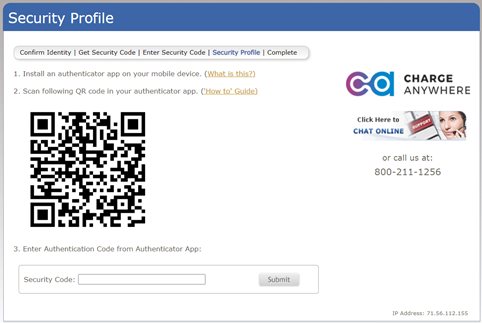
Please note the links within the screen above next to steps 1 and two which explain what an authenticator app is and how to scan a QR code, in the event that any of these steps involves information that is unfamiliar.
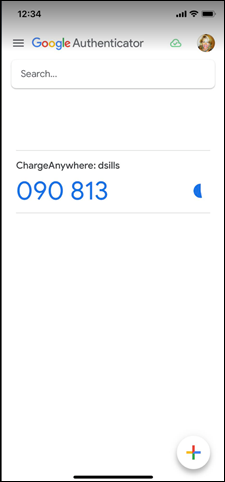
6. You can then open your authenticator app on your mobile device. In the example below we will continue the process using the Google Authenticator app. In Google Authenticator, click the + sign at the bottom right. This will take the user to a screen with the option to Scan a QR code. Tap that option.

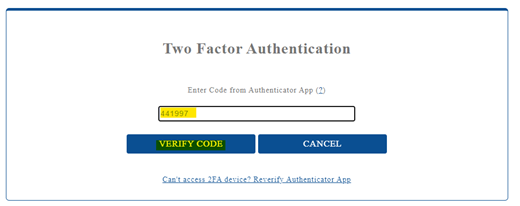
7. Now the app will enable your camera so that you can scan the QR code. Once scanned, you will receive a code to then enter into Transaction Manager. Note the timer feature on the right indicating the code is time-based and expires quickly and is replaced by new codes every several seconds. Enter the active, unexpired Security Code into Transaction Manager and click Submit.
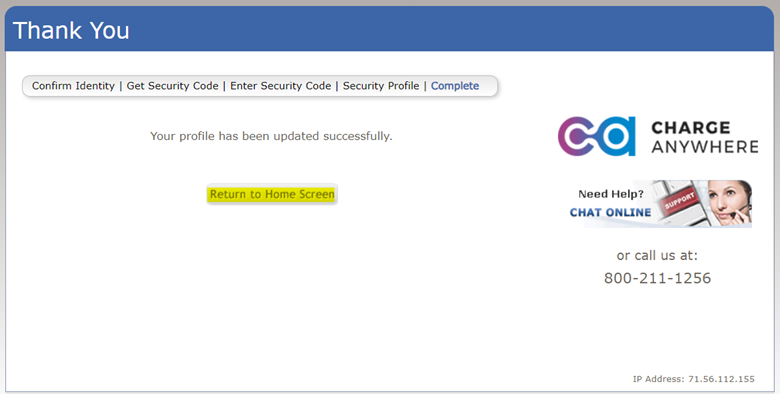
8. Once completed, you will receive confirmation that your profile has been successfully updated. Click Return to Home Screen to continue business as usual.
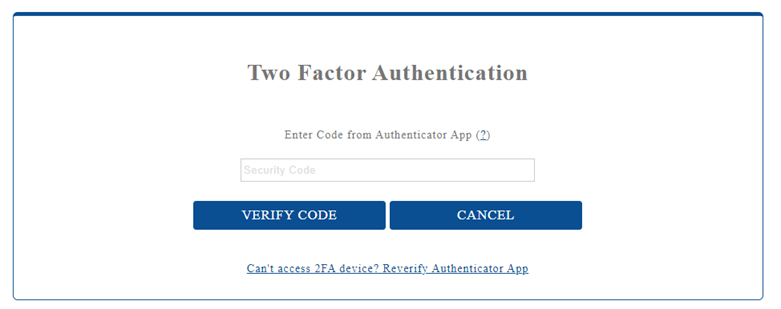
9. Each subsequent time you log in you will then come to the following screen.
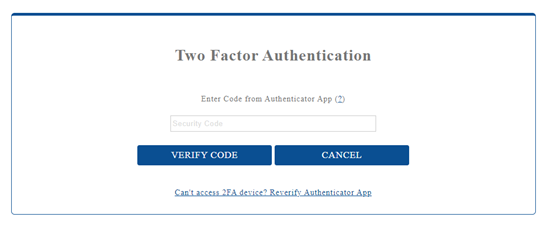
10. Open your authenticator app, enter the code provided before it expires, and select VERIFY CODE.
From there you will proceed to the Home screen.
6. What to Do if the TOTP Permission Is Not Yet Activated within Transaction Manager
If, when you log in, you go straight to the Home page and do not go through the security screen process described in section 5, that simply means that your Channel Partner has not yet enabled Two Factor Authentication on your user profile. You can actually set this up yourself.
To enable TOTP, perform the following steps:
1. At the top menu bar, click USER MANAGEMENT.

2. Under the header in the middle of the screen.

Find your profile and Select Actions.

3. Doing so will result in a pull-down menu being displayed. From here select User Profile.

4. With this selected, then select SUBMIT.

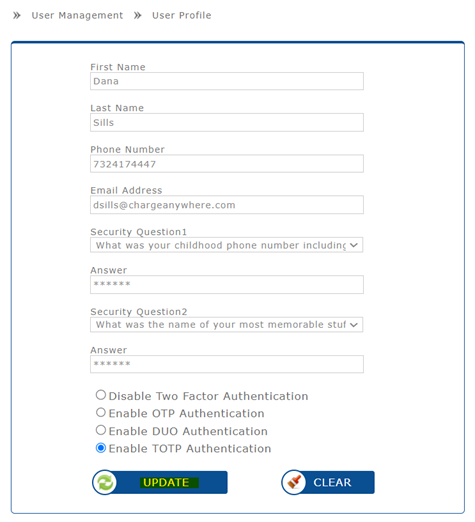
5. This will bring you to your User Profile with the Two Factor Authentication options at the bottom of the screen. Select Enable TOTP Authentication and then UPDATE.
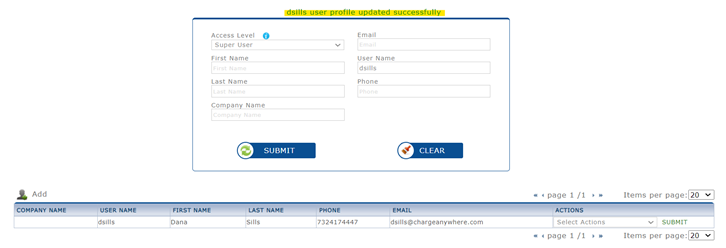
Upon successful updating, you will see confirmation on the main USER MANAGEMENT screen.
6. If you then LOGOUT,

the next time you log in, you will be brought to the Confirm Your Identity screen referenced at the beginning of Section 5. Follow the steps in Section 5 to complete the pairing of your authenticator app to your Transaction Manager login.
7. The Transaction Manager Login Experience After Complete TOTP Set Up
The next time you log in, you will immediately see the following:
Open your Authenticator app, find the security code associated with Transaction Manager, enter it, select VERIFY CODE, and then you will be brought to the Home screen to conduct business as usual.
8. Reverifying Your Authenticator App
Once you are fully set up, on the Two Factor Authentication screen, you will see a link beneath VERIFY CODE called Can’t access 2FA device? Reverify Authenticator App.
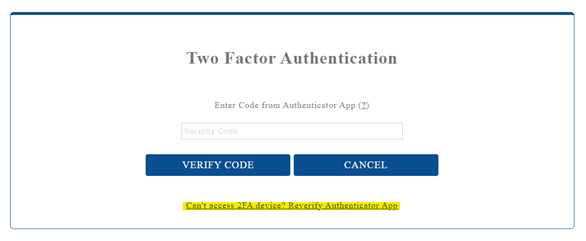
Selecting this link will bring you back to the Confirm Your Identity screen in section 5 so that you can pair your authenticator app with your Transaction Manager Account. This is especially helpful if you decide to change authenticator apps and need to pair a new app with your Transaction Manager account.
Subscribe to Documentation Updates
Receive a monthly summary of new and updated technical documents.